Showing posts with label foodbuzz. Show all posts

Tuesday, April 19, 2011

Bucking trends...

I have never been big on following the trends, I've never cared too much to go buy the latest clothes (although I don't think I'm unfashionable, guess that's easy to say since I'm the one judging myself) and truth is once I find something I love (be it clothing, furniture, etc.) I could care less if it's 'trendy' it's something I will hang on to as long as I can. So when bacon hit the radar as 'trendy' I was a little sad to say the least, I've been a bacon fan as far back as I can remember.

As a small child my great grandmother (I've been a lucky girl who has known great grandparents and grandparents on both sides of the family) would take me to the grocery store with her and spoil me rotten...she let me pick out whatever my heart desired and at a very young age she taught me how to make bacon (in the microwave, because who trusts a 5 year old with the stove!). My poor mother was probably a bit horror stricken, she's not a huge bacon fan and really was a health-nut most of my childhood. Coming to my great-grandmothers to find her 5 year old happily nuking bacon was likely a bit of a shock. I always adored my great grandparents, bacon or not and have very fond memories of summers at their home, including my great-grandfather's huge veggie garden which continues to inspire me today.

I speak of this not to brag about the fabulous family I grew up with or the fact that I was lucky enough to know great grandparents but to prove my bacon pedigree. I have long been a fan and so when it became a trend, when it hit all the 'food' shows I was a bit sad. I suddenly looked like everyone else who loves bacon, as if I jumped on the band wagon, I'm here to say I was an early adopter! For those of you who have read my blog before you'll see that bacon is ubiquitous in my cooking, not so much so that I'll be suffering a major heart attack anytime soon but it's definitely present and has been since before bacon became the 'it' food.

Now that I'm done trying to prove myself, the purpose of my rant is really to share with you something delicious, slightly unexpected and a condiment that stands on it's own, bacon jam! Yes, I know it's been done, especially since the 'trend' began but this is my version, a little bit of heat, a little bit of sweet and a good solid dose of smokiness.

Bacon Jam
1 lb Thick Cut Smoked Bacon
1 Large Sweet Onion, Cut into 1/4 inch rounds
3 Cloves Garlic, Minced
1 Adobe Chipotle Chile + 1 Tsp Chile Sauce from the Can
1/4 Cup Maple Syrup
1/4 Tsp Ground Allspice
1/4 Tsp Ground Cinnamon
1/4 Tsp Ground Nutmeg
1 Tbsp Shaved Dark Chocolate (at least 75% cocoa) or 2 Tbsp Dutch Process Cocoa Powder
1/2 Cup Dark Brown Sugar
3/4 Cup Strong Brewed Coffee (I prefer to use Pecan Flavored Coffee)

1. In a large dutch oven cook bacon over medium high heat until crispy on the edges but tender in the center. Remove from pot, set on paper towels to drain excess grease. Remove all but 1 Tbsp of rendered fat from pan. Chop bacon into half-inch pieces.
2. Decrease heat to medium-low and add onion and brown sugar. Cook until onions are well caramelized, stirring frequently for approximately 20 minutes.
3. Add garlic and remaining spices (including chiles and adobo sauce), saute for 5 minutes.
4. Add liquids and bacon back to pan, increase the heat to medium and bring to a boil. Let boil 3 minutes.
5. Decrease heat to low and simmer for 2 hours, stir every 15-20 minutes.
6. If mixture become too dry add water by the tbsp to keep mixture from burning and sticking. Final texture should be moist and sticky, like a jam.

I should have far more interesting photos than the jar full of jam but you see it's been consumed so fast I really forgot....you should feel lucky I snagged these pictures : ) This is delicious in so many ways, on an egg sandwich, a BLT (instead of the bacon), just on a piece of bread as an appetizer...possibilities are endless!


Slight disclosure here, while I've been planning to share this post for a while it also coincided with a Foodbuzz program/contest called Baconalia.

Tuesday, March 1, 2011

Texas Beef meets Aussie Pies

Of late I have been inspired by things around me, either restaurants in the area, food trucks who provide amazing goodies to us office dwellers at lunch or grocery stores/farmers markets. I am fortunate to be surrounded by amazing food and ingredients and have great inspiration. Our office has recently started having visits on Mondays by an Austin company called Boomerang Pies, each Monday they bring their little truck around and pull up outside our office and for about $5 you can get one of many tasty concoctions, my current favorite is the Thai Chicken, mmm just thinking about it makes my mouth water. I share this for two reasons, one because I love that Thai Chicken pie and two, because a cool Austin based company is now featured at Whole Foods, yup some of the Southern States Whole Foods will now stock these beauties! **Just to be clear, my endorsement of these tasty pies is wholly my own, no one from Whole Foods or Boomerang knows, has asked for or paid for my ringing endorsement.

For those of you who aren't lucky enough to live in the South ;) you'll just have to make your own pies. Thankfully I recently was selected to participate in a fabulous Foodbuzz Featured Publisher program for the Texas Beef Council and thus had ample beef with which to make a meat pie! This post is one in a series of four that will be focused on some of the fabulous lean cuts available from Texas Beef Producers, I am lucky enough to be smack dab in the heart of the great state of Texas and have ample product available to fill at least four posts with!

So, back to the meat pies. the Aussie Meat Pie became known as the 'national dish' of Australia back in 2003 when then Premier Bob Carr declared it as such. The meat pie a hand-sized treat containing largely diced or minced meat and gravy, sometimes with onion, mushrooms, or cheese. Imagine a version of a Hot Pocket that isn't fully of random processed foods but instead holds goodness and warmth and gravy! How can you make one of these you ask? Well, let me share my version of a Guinness pie...


Aussie Meat Pies
3 lbs Beef Chuck Roast, diced into 1/2 inch cubes
1/2 Cup Flour
3 Tbsp Vegetable Oil
2 Cloves Garlic, Minced
1/2 Large Onion, Diced
2 Tbsp Black Pepper
1 Tbsp Ground Coriander
1/4 Cup Worcestershire Sauce
1/4 Cup Soy Sauce
1 14oz Bottle Guinness, or other stout beer
4 Sheets Frozen Puff Pastry, thawed and pliable
1 Egg, beaten


1. Preheat oven to 400 F.
2. Dredge beef in flour and brown. Add garlic and onion and saute for 4 minutes. Add spices, stir well.
3. Add Worcestershire sauce and soy sauce, cook until liquid is nearly gone.
4. Add beer, cook until meat is coated in a thick gravy.
5. Slice pastry into four pieces, spoon mixture into pastry and fold over to form a turn-over type shape. Place on parchment or silicone baking mat on baking sheet.
6. Brush with egg wash, sprinkle additional black pepper over the tops. Bake approximately 8 minutes or until golden brown.

Serve hot!


These were gone in a flash and got my wheels spinning on other great combos to fill the pastry with!

Monday, January 31, 2011

Foodbuzz Tastemaker: ConAgra

I know I've sung the praises of Foodbuzz a few times now in posts about cool products that I've had the pleasure of testing through their Tastemaker Program but I am here to do it again, this time it's some items that are well loved pieces of most home cook's repertoires, peanut butter (specifically Peter Pan) and Rotel. I recently was fortunate enough to receive a nice package of ConAgra products (in addition to the aforementioned there was a nice big can of PAM spray and a can of Hunt tomatoes that will surely see chili soon!) and a super cool HD Flip Cam! Normally I would do anything to keep myself behind the camera instead of in front of it but the stipulation was that part of the deal was to film some of your favorite SuperBowl recipes...so in front of the camera I got stuck! Oh well, just don't make fun of me and somehow I'll survive :)

While I only provided footage of one recipe, I made a number of 'Bowl' recipes that I wanted to share, for those of you who know me, pro football isn't usually my shtick but since the Horns were in a pretty sorry state this year I have to watch something!

As I pondered what to do with my ConAgra bounty I realized the easy (and fun) course of action involved preparing a dish for each team playing....and of course I can't forget a "Dallas" dish to honor the Jerrydome where it's being held and lastly I had to pay a little homage to the Saints as the last champ.

So without further adieu, in the order that they were served:

As a tribute to the Steelers:

Terry Bradshaw's Blue Cheese Chips
*This was modified to make it slightly less calorie laden

12oz Thick Cut Kettle Chips
2oz Blue Cheese Crumbles
1/2 cup Bacon Crumbles
3 Green Onions, sliced on a bias, green parts only
1/2 Red Bell Pepper, roasted and then diced
Seasoned Sour Cream (recipe to follow)

1. Spread chips evenly on an oven safe dish. Dollop with sour cream and then sprinkle bacon bits over the top. Bake at 350 for 2-4 minutes.
2. Remove from oven and sprinkle with remaining ingredients.

Seasoned Sour Cream
6oz Light Sour Cream
1oz Mayonnaise
1 Tsp Lemon Juice
1/2 Tsp Worcestershire sauce
1/2 Tsp Garlic Powder
1/2 Tsp Paprika
1/2 Tsp Celery Salt
1/2 Tsp Cayenne
1//8 Tsp Curry Powder


While it's not my creation these were a certain hit, everyone loved the chips and they complimented the traditional buffalo wings well!

As my tribute to the Packers:
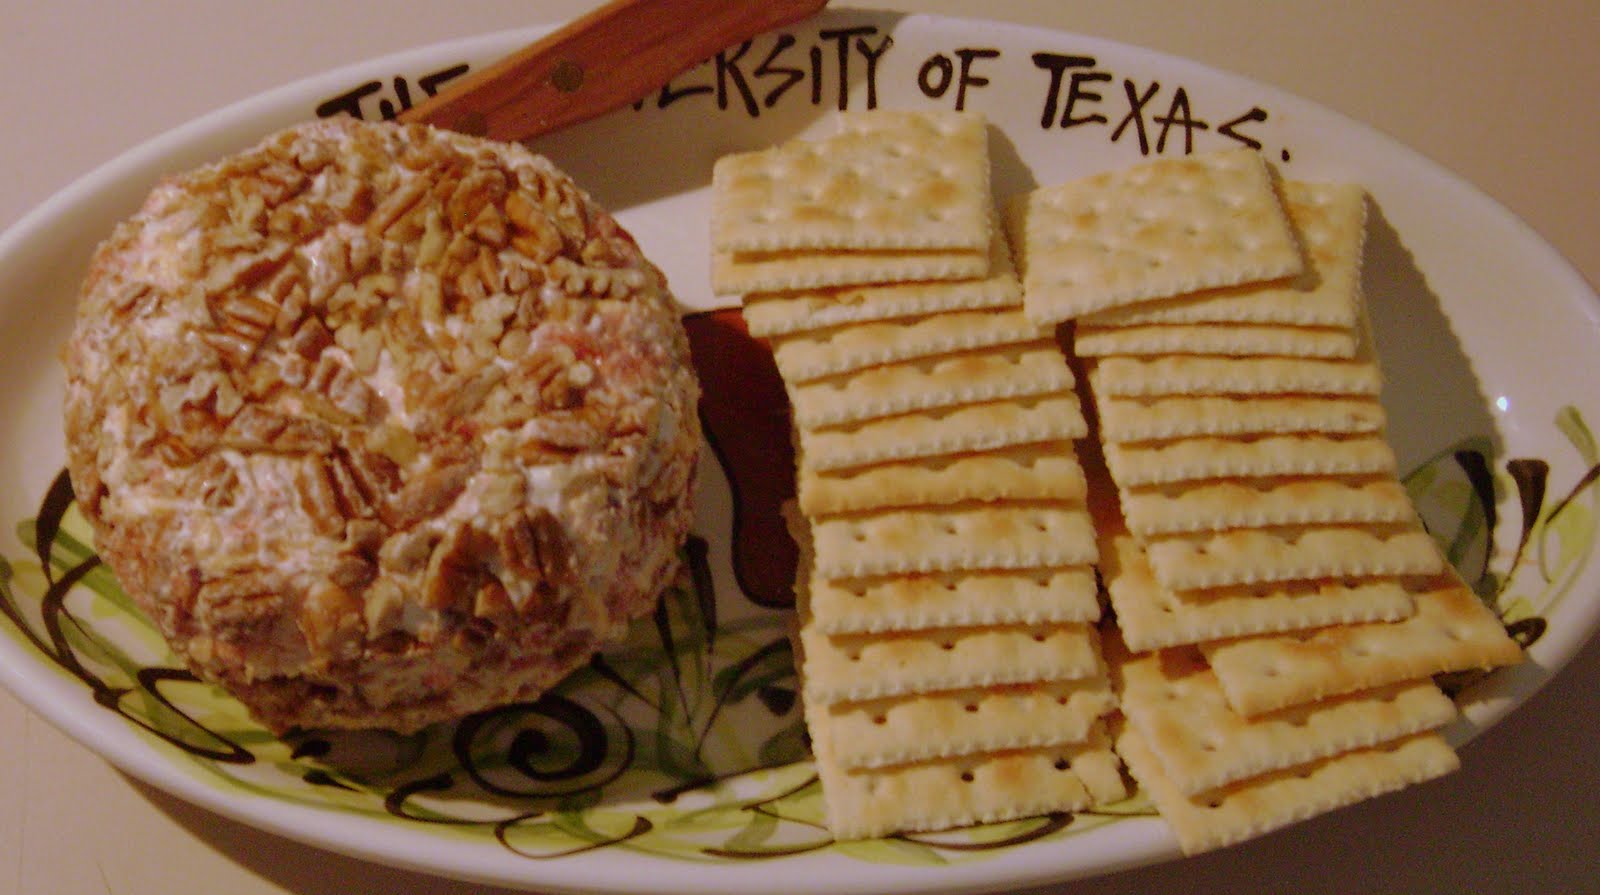
Spicy Cheesehead Cheddar Ball
8oz Softened Light Cream Cheese
1/2 Tsp Cayenne
1 14oz can well drained Rotel
4oz Sharp Cheddar Cheese, shredded
1/2 Cup Bacon Crumbles

Mix all together, shape into a ball, wrap in plastic wrap and chill overnight. Serve with crackers


While I, like many of my Texas-brethren, am conflicted in my feelings about the new home of the Cowboys I can't deny that it's a pretty fab home for this years SuperBowl, so in homage to the Stadium:

Jerrydome (Cowboy Stadium) Tex Mex Pizza
1 Cornmeal Pizza Crust (recipe to follow)
1/2 14oz can rinsed and drained black beans
1 14oz can Rotel Tomatoes
8oz shredded cheese
1 1/2 cups Cilantro Pesto (recipe to follow)
(Fajita meat would be good but I didn't use any)
1/2 Medium Red Onion, thinly sliced

Layer pesto, cheese and toppings onto crust, bake at 500 for 8-10 minutes.

Cornmeal Crust
2 Tsp Active Dry Yeast
Pinch Sugar
2/3 Cups Warm Water
1 2/3 Cups All Purpose Flour
1/4 Cup Cornmeal
1 1/2 Tsp Salt
2 Tbsp Olive Oil

1. Sprinkle yeast and sugar over warm water and let it bubble/foam up (takes appx. 10 minutes).
2. Mix flour, cornmeal and salt together in a large bowl, make a well in the center and add in yeast mix.
3. Knead well for 7-10 minutes then set aside in a warm, draft-free location for 1 hour or overnight in the fridge.

Cilantro Pesto
1/4 Cup Toasted Pecans
2 Cloves Garlic
2 Cups Cilantro Leaves
1/2 Cup Olive Oil
2 Tbsp Lime Juice
1 Tbsp Lemon Juice
1/2 - 1 Tsp Hot Sauce
Salt & Pepper to Taste

Blend all together in a blender or food processor until desired consistency.


Last but certainly not least, as a fond reminder of a city that is dear to my heart and the underdogs who showed everyone last year, New Orleans Saintly Peanut Butter Pie!

New Orleans Saintly Peanut Butter Pie
1 8oz light cream cheese, softened
1/2 Cup Sugar
1 Cup Peter Pan Peanut Butter
8oz Light Whipped Dessert Topping, at room temperature
1/2 Tsp Vanilla
1 Cup Pretzels, crushed
3 Tbsp Butter, Melted
Chocolate, optional to shave over the top.

1. Mix crushed pretzels and butter and press into pie plate, bake at 350 for 8-10 minutes. Remove from oven and let come to room temperature.
2. If desired, drizzle melted chocolate over the bottom of the crust and allow that to set as well.
3. Mix cream cheese, sugar, peanut butter, vanilla, and whipped topping together very well (so no lumps exist) then pour into shell and chill overnight.
4. Shave chocolate over the top the next day if desired.


I wanted to give one big THANKS to Foodbuzz and ConAgra for the neat package of stuff I got to use to show-off some favorite Football foods, hope everyone has a Happy Superbowl!

Wednesday, November 17, 2010

Tailgating, it's not just for football

While many tailgate I venture to say none compare to the frequency or voracity of Texas tailgaters, for example, at any given Longhorn sporting even you are likely to see many RVs decked out (I know that's normal), a school bus or two that have been purchased and converted to classic cars be-decked with Horns, it's Texas, everything is bigger. However, tailgating is not simply limited to football, baseball, basketball, volleyball and just about every other sporting event imaginable can be celebrated at a tailgate. Frankly anything can be celebrated at a tailgate, one of the funniest (and scariest) things I've read lately on Wikipedia "(tailgating) is also used at non-sporting events such as weddings and other non-sports-related barbecue gatherings."

While I'm not about to propose wedding tailgating, to illustrate my point, we recently tailgated a regatta my boyfriend participated in! While that was celebrated at a local restaurant, we did tailgate the Longhorn football game this past weekend, while the Horns came out a little worse for the wear we at least enjoyed some tasty food and nice cold beer.

Our tailgate was an amazing combination of foods, some of which I have Hormel and Foodbuzz to thank for! In mid October Hormel and Foodbuzz sent out an invitation to participate in the Foodbuzz Tastemaker program by sharing Hormel products with friends and family (I know I get all the tough jobs!) so tasty pork dishes were my contribution to the Tailgate fare!

First, using the Hormel Always Tender Original Pork Tenderloin, Jalapeno-Honey Glazed Pork Kebabs.

Jalapeno-Honey Glazed Pork Kebabs

1 12-ounces pork tenderloin
1/3 cup honey
3 tablespoons light soy sauce
1 tablespoon toasted sesame oil
2 fresh jalapeno chile peppers, seeded and finely chopped*
1 tablespoon grated fresh ginger
1/4 to 1/2 teaspoons crushed red pepper
2 Medium Red Onions, Cut into Chunks
1 Cored, Cubed Pineapple

1. Trim fat from pork. Place pork in a resealable plastic bag set in a shallow dish. For marinade, in a small bowl, combine honey, soy sauce, sesame oil, the chopped jalapeno peppers, the ginger, and crushed red pepper. Pour marinade over pork. Seal bag; turn to coat pork. Marinate in the refrigerator for at least 12 hours or up to 24 hours, turning bag occasionally.
2. Drain pork, reserving marinade. Cube pork and place place on skewers interspersed with pineapple and red onion.
3. Grill until pork is cooked through, brushing with marinade periodically.
4. Oven Directions: Prepare as directed in steps 1 and 2. Place pork on a rack in a roasting pan. Roast in a 425 degree F oven for 25 to 35 minutes or until juices run clear (160 degree F), brushing once with reserved marinade after 10 minutes of roasting. Discard any remaining marinade.


In addition, with some of the bite-sized Hormel Turkey Pepperoni's some Mini-Pepperoni Rolls, you might recognize the dough as the same dough my Mom and I used in our Foccacia:

Bite-Sized Pepperoni Rolls

1/2 Batch of Olive Oil Dough (recipe below)
2 Packages Hormel Turkey Pepperoni bite-sized
1/2 Cup Shredded Mozzarella Cheese
1 Tbsp Dried Oregano
1 Tbsp Dried Basil

1. Preheat oven to 425.
2. Using 1/2 of Olive Oil Dough, roll out a large rectangle, cover rectangle with a mixture of cheese, pepperoni and spices, roll dough carefully keeping all ingredients inside of the roll.
3. Cut roll into hand-sized pieces, brush top with egg wash.
4. Grease a cookie sheet with olive oil or line with parchment paper. Bake 20 minutes (or until golden brown). Brush tops of rolls with melted butter or olive oil if desired.


Olive Oil Dough
Makes 4-1lb loaves.

2-3/4 cups lukewarm water
1-1/2 tablespoon granulated yeast
1-1/2 tablespoon salt
1 tablespoon sugar
1/4 cup extra virgin olive oil
6-1/2 cups unbleached all-purpose flour

1. Mix the yeast, salt, sugar, and olive oil with the water in a 5-quart bowl, or a lidded (not airtight) food container.
2. Mix in the flour without kneading.
3. Cover (not airtight), and allow to rest at room temperature until dough rises and collapses (or flattens on top), approximately 2 hours.
4. The dough can be used immediately after the initial rise, though it is easier to handle when cold. Refrigerate in a lidded (not airtight) container and use over the next 12 days.

For this crowd I doubled up both recipes, serving two tenderloins worth of kebabs and a double batch of pepperoni rolls it was a tasty treat for our tailgate!

Wednesday, October 20, 2010

Fresh Express: Fresh Pizza Fast!

As a Foodbuzz Featured Publisher I get occasional offers to test out delicious products, recently I was given the chance to test out Fresh Express Salads, among the usual delicious salad I was searching for some creative ways to use some of these terrific ingredients and decided to turn my favorite sandwich into a pizza.

I lucked into getting mom into making the crust, which she did a terrific job on! With her help the pizzas came together in a flash!. We pulled together the crust and then covered it with a simple and tasty spinach-walnut pesto (featuring a bag of Fresh Express Baby Spinach) and then layered sliced tomato, mozarella cheese and of course, chopped bacon atop the crust and popped it in the oven!


Spinch-Walnut Pesto
1 Bag Fresh Express Baby Spinach
1 Cup Walnuts
1/2 Cup Olive Oil
1/2 Cup Parmesean
2 Cloves Garlic
Salt & Pepper to taste


Combine all ingredients in a food processor (yes, I took the easy way out), mix until desired consistency.


In addition to the BLT pizza I served a Roasted Veggie and Goat Cheese pizza, we pan fried a fresh eggplant and roasted a red bell pepper then layered them atop a pizza covered with a mixture of 1 4oz container of whipped softened cream cheese, 1 3oz roll of goat cheese, softened and then over the fresh vegetables we layered additional parmesean cheese, after the pizzas came out of the oven we topped this one with freshly chopped basil.


Family pizza night for grown ups - or a sneaky way to get some veggies for your sophisticated kiddos!


Monday, September 20, 2010

VOTING NOW OPEN!

Please, if you have a second, head over to the Project Food Bog site and vote for my entry!

Thanks - that's enough shameless self promotion for one day :)

Saturday, September 18, 2010

Project Food Blog: Challenge One

As I warned you recently, I am competing in the Project Food Blog Challenge by Foodbuzz, for our first challenge, each competitor was asked to create a post that defines us as a food blogger.

How do I define myself, channeling my inner zen I think the best way to tackle this is to describe why I started blogging, in a nut shell it encapsulates a lot about me and helps describe what matters to me both personally and as a food blogger.

In May 2004 my father began commuting between Austin, TX and Torreon Mexico for work, eventually moving down there and taking my mother with him. Over the next few years it was a sort of withdrawal for me, sure I spent time away from my parents but not like this, these two people who I love whole-heartedly also are two of my closest confidants, to have both of them so far away was tough to say the least.

In 2006 my mother started blogging, it was her way of sharing the ex-pat experience, first with our immediate family and not long after with many other people out in cyber-space. I have never considered myself much of a writer but she began encouraging me, to take photos and document the things around me. At the time I was starting to truly explore cooking and the boundaries of what I knew in terms of cuisine. Quickly I realized that food was what I could write about, what I cooked, what I shared with family and friends and of course, a sprinkling of my favorite team's football successes (with much less finesse than the cooking since I'm pretty amateur at football commentary). Thus began my journey, what I hope you draw from it is that for me, the important things about this blog are a combination of those who are closest to me (family and friends) and how I express myself for them, in cooking and sharing the fruits of my labor.

In honor of that theme, I would like to share a recipe that I recently made for a Friday-night dinner with my family, a spin on the classic, Mac 'n Cheese.


Italian Mac 'n Cheese

2 Large Sprigs Rosemary
2 Large Sprigs Oregano
2 Tbsp Fresh Parsley
1/2 Cup Panko
6 Slices Pancetta
2 Lbs Pasta
1 Cup Halved Grape Tomatoes
1 Bell Pepper, Sliced
1/2 Cup + 4 Tbsp Butter
3 Cups Milk
1/2 Cup Flour
2 Cloves Minced Garlic
1 Tsp Salt
2 Tsp Dried Oregano
2 Tsp White Pepper
2 Tsp Nutmeg
1 Tsp Cayenne
1 Tsp Red Pepper Flakes
1 1/2 Cup Shredded Mozzarella
1 1/2 Cup Shredded Parmesan

1. Crisp the pancetta and saute garlic in a tsp of olive oil in a small skillet, remove pancetta and set aside. Once the pancetta is cool, coarsely chop it.
2. Heat milk over medium high in a sauce pan. While milk is heating, heat butter in a large skillet. When butter begins to bubble, add flour and garlic, whisk until well incorporated.
3. Pour milk into butter, whisk until thick.
4. Remove from heat and season with white pepper, cayenne pepper, pepper flakes, nutmeg and salt. Add 5 1/2 cups cheese (evenly split between the two types) and the chopped, crisp pancetta and mix well.
5. Boil pasta until al dente. Preheat oven to 375.
6. Spray 9x13 casserole pan with vegetable oil. Place drained pasta in pan then pour cheese sauce over the top.
7. Sprinkle pasta mix with panko and remaining 1/2 cup of cheese.
8. Bake until brown and bubbling, approx. 30 minutes.


I hope that you have a better picture of who I am and what I believe. The most important thing I can do is to bring my loved ones together and enjoy their company, the easiest way to do that is with a good meal, beyond that I just want to share my finds and experiences with others.

These are the people I cook for, and the people who exert the greatest influence over me.

Wednesday, April 14, 2010

Foodbuzz Tastemaker Goodies!

Sometimes I luck into goodies, recently I've had the opportunity to taste two of Bertoli's new sauces, Four Cheese Rosa and Arrabiata. For both I decided it was high time I learn to use the pasta machine and make some homemade pasta. The first attempt at pasta was a simplistic situation, a little flour, a little egg and a little salt VOILA! pasta emerged :)

First I went searching for a good recipe, I ended up trying the first thing I saw on Google, it was a little egg-heavy but it tasted good. I went simple, shaping the dough and running it through the machine a few times to create a fettucini.

Pasta Rosa with Bacon and Onion

1 Jar Bertoli Pasta Rosa Sauce
1 Medium Onion, Thinly Sliced
6 Slices Bacon, Chopped
Parsley, for Garnish

1. Crisp the bacon in a large, heavy bottomed skillet. Remove once it is crisp and set on paper towels to remove excess grease.
2. In bacon rendering, caramlize the onion until it is golden brown. Don't rush this process, allow it to slowly cook over medium heat until it's nice and browned.
3. Pour pasta sauce over onion, add 1 Tbsp reserved pasta water to the sauce and stir until incorporated. Add bacon and incorporate well.
4. Mix in pasta and allow it to sit in the sauce for a few minutes. Serve topped with parsley.

A very simple but very tasty use of the Pasta Rosa. The next dish I pulled together was a little more inspired as I went the Ravioli route, but that'll have to wait a day or two before it gets posted.


Thanks again to Foodbuzz and their partner Bertoli!

Sunday, February 28, 2010

Foodbuzz Tastemaker Goodies....

To my delight I recently returned home and found a box on my front porch with a bottle of the new Kikkoman Ponzu Lime Sauce. The mission, to taste it, test it and use it in whatever tasty vittles crossed my mind. The solution: flank steak marinade. I know, I know it doesn't sound all that innovative or exciting, but belive me, when I was done it was zippy and delicious!

Chili Lime Steak Marinade
4 Adoboe Chilies, Chopped
1 Tbsp Worchestshire Sauce
4 Tbsp Catsup
2 Tbsp Honey
2 Tbsp Kikkoman Ponzu Lime Sauce
Emeril's Steak Seasoning


1. Season steak to taste with Emeril's Steak Seasoning
2. Mix remaning ingredients together and pour over steak, allow to sit at least 30 minutes but up to 4 hours.
3. Brush excess marinade off and cook steak to taste.

SO this is super simple but so good, it'd be delicious for fajita tacos. Fair warning, if you don't see the chilies it's pretty spicy but the taste of adoboe chiles is smoky and wonderful and so worth the heat :)


To balance out the spicy steak I served a porcini risotto from the pages of the Jan/Feb 2010 Cooking Light, it tasted anything but healthy!

Risotto with Porcini Mushrooms and Mascarpone

2 cups boiling water
1 cup dried porcini mushrooms (about 1 ounce)
1 (14-ounce) can less-sodium beef broth
Cooking spray1 cup uncooked Arborio rice
3/4 cup chopped shallots
2 garlic cloves, minced
1/2 cup dry white wine
1/4 cup (1 ounce) grated Parmigiano-Reggiano cheese
1 tablespoon chopped fresh thyme
1/2 teaspoon salt
1/2 teaspoon black pepper
1/4 cup (1 ounce) mascarpone cheese
Fresh thyme leaves (optional)

1. Combine 2 cups boiling water and mushrooms; let stand 30 minutes or until soft. Drain through a colander over a bowl. Reserve 1 1/2 cups soaking liquid; chop mushrooms.

2. Bring soaking liquid and broth to a simmer in a small saucepan (do not boil). Keep broth mixture warm.

3. Heat a large saucepan over medium-high heat. Coat pan with cooking spray. Add rice, shallots, and garlic; sauté 5 minutes. Add wine, and cook until liquid evaporates (about 2 minutes).

4. Add 1 cup broth mixture to rice mixture; cook over medium heat 5 minutes or until the liquid is nearly absorbed, stirring constantly. Add remaining broth mixture, 1/2 cup at a time, stirring constantly until each portion of the broth mixture is absorbed before adding the next (about 25 minutes total). Add mushrooms, grated cheese, chopped thyme, salt, and pepper; stir gently until cheese melts. Spoon 1 cup risotto into each of 4 bowls. Top each serving with 1 tablespoon mascarpone and thyme leaves, if desired.

Tuesday, February 2, 2010

Old Habits...

Old habits are like a well worn hoodie, you relish in finding them and enjoying them once more and miss them terribly when you can't get to them. I have longed to bring normalcy back to my life...routine, being the OCD person that I am I crave it. Unfortunately my life has been anything but normal the last few months....the holidays, life at a start-up company and the random social events I find myself committed to seem to have taken their toll in a lack of convention. So as I try and re-start my good habits (and kick the bad ones) I find myself coming back to my blog. This has always been a struggle for me, I've never been a writer, unless it was a research paper or something academic it never came to me. I'm a little critical of myself and my writing (ok maybe very critical) so I have always looked at what I write and erased it numerous times. This blog has been the only exception to that rule so here I sit once more, back from an extended furlough attempting to do something that is good for me.

Now, to clarify, just because writing on this blog is good for me doesn't mean I'm going to post recipes that are exclusively healthy :) No, to the contrary, I have stores of photos and recipes I've made over the past few months (and stockpiled hoping I would eventually get around to posting them) and since they were very holiday focused for two months they won't necessarily be healthy...oh well being all good is never that much fun!

The first two of such recipes are healthy in a devilishly tasty way, so I guess it's walking the fine line between the good and bad. Thanks to Foodbuzz and Egglands Best for a coupon for a delicious dozen eggs. With some of the beautiful Egglands Best eggs I pulled together two simple dishes, an appetizer (although I love it as a vegetarian dinner on weeknight) and one of my favorites, an egg custard.

Originally I came across this in a Curtis Stone cookbook (Cooking with Curtis) where it is listed as a hearty appetizer, however it has quickly become a favorite for me and can be found gracing the dinner table after a long day at the office. It's the perfect comfort food, delicious crunchy toast with a perfectly poached egg and amazing mushrooms.

Sauteed Mushrooms on Fried Ciabatta with Poached Egg
*Adapted from Cooking with Curtis by Curtis Stone

3/4 Cup White Wine
1 Tbsp White Vinegar
6 Tbsp Butter
1/2 Shallot, peeled and finely chopped
1/2 Garlic clove, peeled and minced
14oz mushrooms, I prefer a mix of Baby Bellas and Button Mushrooms for everyday cooking but Oyster Mushrooms or some Shitake would be great as well
Salt & Pepper to taste
1 Tbsp Flat Leaf Parsley, Chopped
4 Slices of Ciabatta
Extra Virgin Olive Oil


1. Place a large deep saucepan over medium-high heat with butter inside. Once butter has began to melt, add shallot and garlic. Sweat 1-2 minutes.
2. Add mushrooms and wine, allow wine to reduce to about 1/2 its volume.
3. While wine is reducing, bring a pot of water to a boil (add 1 Tbsp White Vinegar to the water).
4. Break eggs into boiling water and poach for 2 minutes.
5. Place ciabatta slices on a griddle pan or cast iron, brush with olive oil and toast until slightly crispy.
6. Place toasted ciabatta on serving plate and top with the mushrooms, top mushrooms with a sprinkle of parsley and then the poached egg. Drizzle with olive oil, serve.

This should comfortably serve 4 people.

Now if that amazing poached egg doesn't make you want to run out and get a dozen eggs then I'm not sure what will! Oh wait, I do know, it's this egg custard. I love egg custard, I have vague recollections of watching my grandmother make this in an ancient oven (not because she's that old but because she lived in a very old, historic ranch house for a long time). Mimi would put these in and turn on the light in the oven and that was really the closest I would get to the custard until after dinner...of course she made them mid-afternoon so I would sit in anticipation for quite sometime until I got to eat the dessert! This is such an easy recipe that I was astounded, funny, I hadn't actually made my own egg custard until I tested this out...but I will surely be making more soon.

Easy Egg Custard

2 cups whole milk
2 eggs
2 egg yolks
1/3 cup sugar
1 teaspoon vanilla extract
Freshly grated or ground nutmeg


1. Preheat oven to 300°F.
2. Place six 4-ounce ovenproof cups (you can use ramekins, or coffee cups marked as oven-safe) in a deep baking pan just large enough to hold them.
3. In a medium saucepan, bring the milk to a simmer over medium-low heat.
4. Meanwhile, in a separate bowl, whisk together the eggs, yolks, sugar, and vanilla.
5. Slowly pour the egg mixture into the simmering milk, whisking gently to combine.
6. Pour the mixture through a fine strainer into the cups (if the strainer clogs, use a spoon to scrape it clean), then sprinkle lightly with the nutmeg.
7. Pour hot (not boiling) water into the pan until it reaches halfway up the sides of the cups.
8. Bake until the custard is just set (it can still be a little loose), 30 to 35 minutes.
9. Let the custard cool in the water bath for about 2 hours before serving.

I'm rather embarrassed to admit that in all my free time I forgot to take a photo of the egg custard : (

Now I feel officially like I might be back on track, got up this morning and exercised, packed a healthy lunch, posted on my blog, came home from work and made a pretty healthy dinner....now if I can just lather, rinse and repeat for tomorrow I'll be set!

Wednesday, September 2, 2009

Hatch Chile Week - Day Four: Beer Braised Pork Chops and Hatch Chile Stuffing

Perfecting the spelling of 'Chile' happened in 1983. Senator Pete Dominici made it official by putting it in Congressional Record. He rose and addresses the United States Senate, declaring that even though the word was chili in the dictionary , New Mexicans refuse to spell it the way the rest of America does, and so, he said, he stood before the full Senate and with the backing of my New Mexican Constituents state unequivocally that the dictionary is wrong. Then, after extolling the virtues of New Mexico chile, he told his colleagues, Hospitable as we are to all visitors, we have chile that is mild enough to make a baby coo in delight, or hot enough to make even the strongest constitutions perspire in a sensual experience of both pleasure and pain. He ended by saying, I could go on and on about the wonders of red and green chile, but in reality, all I wanted to do was inform Congress on the correct way to spell the word. A highly interesting tidbit found on the Chile Traditions Website.

So being one who might occasionally mix-up the spelling of Chile/Chili I wanted to gather a bit of intel on how it all works and what the 'proper' way to spell Chile is! Today's chile recipe is a permutation of a food near and dear to my heart, stuffing! It's funny, as a kid I thought stuffing was reserved for holidays and really felt (yup I'm about to offend the good cooks of my family) that no matter who made it, it really was just smushy bread that was heated up a few too many times....a very scientific opinion, huh? Well that's all changed, I'm a convert, of course it has to be good stuffing, but I can assure you, this recipe is! It's a little bit of work for a week night because it requires fresh cornbread but it's so worth it, I swear.

1 8x8 Pan of Fresh Cornbread (mix or from scratch), Crumbled
2 Cups Old Bread, Crumbed
3 Pieces Raw, Chopped Bacon
1/4 Cup Sweet Onion
1/2 Tsp Roasted, Minced Garlic
1/2 Cup Golden Raisins
1 Chopped Green Apple
3/4 Cup Chicken Broth
1 Tsp Ground Sage
1 Tsp Ground Thyme
2 Tsp Salt
2 Tsp Black Pepper
2 Chopped, Seeded and Rinsed Hatch Chiles

1. Heat bacon along with onion and garlic in a large skillet until bacon is beginning to crisp.
2. Add green apple and chiles to the mix, cook until apple begins to get tender (appx 5 minutes)
3. Add raisins, chicken broth, sage, thyme, salt, pepper and bread crumbs (both corn and regular).
4. Allow to cook until mixture begins to get crispy, stir so that it crisps evenly.


Now, while you've got your stuffing going (actually before you start it), you'll want to find a tasty protein to go with...although that stuffing is tasty on it's own! I choose some delicious, thick-cut bone-in pork chops that were on sale at the market. To me pork chops are so tasty with a sweet-ish side/sauce and this stuffing made the perfect combination of sweet/spicy and pork!

Shiner Bock Braised Pork Chops

1 12oz Bottle Shiner Bock Hefewisen
1 Tbsp Honey
1/3 Cup Flour
1 Tsp Ground Ginger
1 Tsp Kosher Salt
1 Tsp Black Pepper
1 Tsp Essence of Emeril*
1 Tbsp Olive Oil
1 Tbsp Cider Vinegar

1. Mix Flour with ginger, salt, pepper and Essence of Emeril. Dredge pork chops in flour mixture.
2. Heat a large skillet to medium-high (with 1 Tbsp Olive Oil in it). Once skillet is hot, brown pork chops on both sides.
3. In a bowl, mix beer, cider vinegar and honey.
4. After pork chops are browned, pour beer mixture into the skillet, braise for 1 hour, turn once during the process.


*Another goodie from Foodbuzz!

Monday, August 31, 2009

Hatch Chile Week - Day Two: Hatch Mac'n Cheese

To whet your appetite today, some Chile Facts:

* One fresh medium-sized green chile pod has as much Vitamin C as six oranges.
* One teaspoon of dried red chile powder has the daily requirements of Vitamin A.
* Hot chile peppers burn calories by triggering a thermodynamic burn in the body, which speeds up the metabolism.
* Teas & lozenges are made with chile peppers for the treatment of a sore throat.
* Capsaicinoids, the chemical that make chile peppers hot, are used in muscle patches for sore and aching muscles.
* Chile peppers are relatives of tomatoes, potatoes, and eggplants, all belonging to the nightshade family.
* The color extracted from very red chile pepper pods, oleoresin, is used in everything from lipstick to processed meats.
* There are 26 known species of chile pepper, five of which are domesticated.
Adapted from the New Mexico Chile Institutes’ “Chile Pepper Facts”& located on the Hatch Valley Chamber of Commerce Website
The last few Friday nights I have played the lucky (and willing) hostess for dinner for my family, this past Friday featured a Hatch Chile Macaroni and Cheese, a very simple (yet tasty) cucumber and tomato salad and a Ranch Pan Fried Chicken. The Mac and Cheese was met with resounding approval, to the tone of many second helpings around the table and will definitely be making many appearance on my menus.


Hatch Mac

1 1/2 Sticks Butter
3 Cups Milk
1 Tsp Garlic
1/2 Cup Minced Onion
1/2 Cups Flour
1 Tsp Salt
2 Tsp Nutmeg
2 Tsp Black Pepper
2 Tsp Cayenne Pepper
6 Cups Monterrey Jack Cheese
3 Roasted, Chopped, Seeded and Rinsed Hatch Chiles
1 Lb Elbow Macaroni
6 Slices Cooked Bacon, Chopped
1/2 Cup Bread Crumbs
1 Tsp Olive Oil

1. Saute onion and garlic in a tsp of olive oil in a small skillet until onion is tender.
2. Heat milk over medium high in a sauce pan. While milk is heating, heat butter in a large skillet. When butter begins to bubble, add flour, garlic and onion, whisk until well incorporated.
3. Pour milk into butter, whisk until thick.
4. Remove from heat and season with black pepper, cayenne pepper, nutmeg and salt. Add 5 1/2 cups cheese and the chopped Hatch Chile and mix well.
5. Boil pasta until al dente. Preheat oven to 375.
6. Spray 9x13 casserole pan with vegetable oil. Place drained pasta in pan then pour cheese sauce over the top.
7. Sprinkle pasta mix with bread crumbs, bacon pieces and remaining 1/2 cup of cheese.
8. Bake until brown and bubbling, approx. 30 minutes.


Not only did we have the delicious Hatch Mac but I got to use some very tasty gifts sent to me by Foodbuzz, a sampling of Emeril's Essence, Emeril's Chicken Seasoning, Emeril's Steak Seasoning and Emeril's 'Kicked Up Mustard.' This time I only used the chicken seasoning but it sure added a delicious 'kick' to our meal!


Ranch Pan-Fried Chicken
3 Chicken Breasts, pounded to 1/2 inch thickness
1 Cup Flour
1 Tbsp Bread Crumbs
2 Tbsp Emeril's Chicken Seasoning
1 Package Dry Ranch Dressing Mix
3 Tbsp Vegetable Oil

1. Mix flour, bread crumbs, Emeril's and ranch mix. Heat large skillet with oil over medium-high heat.
2. Dredge chicken in flour mixture.
3. Cook chicken in pan until golden brown on both sides.


If you've enjoyed the looks of this cheesy-hatch dish, you'll really look forward to the entries Gloria Chadwick will get for her Hatch Chile Recipe Contest!

Sunday, August 30, 2009

Hatch Chile Week - Day One: Hatch 'al Pastor'

Each day this week I will be posting a recipe featuring Hatch Chiles, the delicious tasty treat seems to be all the buzz in the blogosphere right now, as evidenced by Gloria Chadwick's newest blog Hatch Heaven and her very cool Hatch-inspired contest,the proliferation of Hatch recipes you can find on sites like Foodbuzz and of course the presence of these beautiful chiles in local stores and on menus. I'm a lucky gal, being located in Texas means that New Mexico's finest chiles are close at hand, a local grocery chain (HEB/Central Market) and even one of my favorite Tex-Mex haunts celebrate Hatch Chile Festival as if we were actually in Hatch!


Each year over Labor Day weekend the residents of Hatch, NM celebrate these delicious peppers with their annual Hatch Chile Festival. The first harvest typically begins at the end of July and farmers are able to continue to produce the peppers until the first frost, Labor Day provides a great long-weekend to celebrate the spicy of the local variety of peppers.

"Born from an extension of the Santa Fe Railroad Company in 1880, Hatch, New Mexico, began as an adobe post office and a railroad flag station. Named after General Edward Hatch, Commander of the Southwest military, the town grew until a flood in 1921 destroyed many of the adobe buildings constructed of earth and wood.
The village rebuilt, and continues to prosper as an agricultural community to this day." - Hatch Valley Chamber of Commerce website
For a town that claims to only have 1,600 residents they certainly are making a name for themselves!

To kick off my week of Hatch Chile Recipes I offer Hatch 'al Pastor' - I am cheating (or being very good, depends on how you look at this) because I am repurposing the leftovers from my Pineapple-Jalapeno Pork Tenderloin as a part of this recipe. If you don't have the tenderloin leftovers that's ok, this could easily be made with some freshly cooked cubed pork tenderloin, thinly sliced and chopped boneless tenderloin or chopped pork shoulder roast.

Hatch 'al Pastor'

3 Cups Cubed Jalapeno-Pineapple Pork Tenderloin (or comparable pork that has been cooked and seasoned with salt and pepper)
1 Can Crushed Pineapple
3 Roasted, Rinsed, Seeded and Chopped Hatch Chiles
A Handful of Freshly Chopped Cilantro (for garnish)
2 Tsp Chili Powder
1/4 Cup Diced Red Onion (for garnish)
Corn Tortillas
Fennel Slaw (to serve alongside the tacos)

1. Pour juice from pineapple into a skillet, add chili powder and hatch peppers. Saute peppers for a minute, add pork.
2. Once pork is coated thoroughly with juices and seasoning, remove from heat.
3. Place in tacos (be careful as too much of the juice will cause your tortillas to break apart).


Fennel Slaw
2 Cups Thinly Sliced Fresh Fennel Bulb
1 1/2 Cups Thinly Sliced Red Onion
2 Medium Carrots Cut into Match-stick size strips
1/2 Cups Chopped Cilantro
1/4 Cup Sherry Vinegar
1 Tsp Sugar
1/4 Cup Olive Oil
1 Tsp Tajin Calsico Seasoning (con limon)
1 Tsp Ground Cumin
1 Tsp Salt
1 Tsp Black Pepper

1. Placed sliced fennel, onion, carrot and cilantro in a large salad bowl.
2. Mix vinegar, sugar, olive oil, Tajin, cumin, salt and pepper together, pour over salad.
3. Refrigerate at least an hour, toss salad prior to serving to ensure even coverage of the dressing.

This is a pretty low-maintenance dinner but it's a tasty way to kick off the week!


Tuesday, April 21, 2009

Tri-Colored Warm Pasta Salad and an Award!

So similar to many of my Foodbuzz friends I received a box last week with a special treat, Buitoni Wild Mushroom Agnolotti, funny thing is the day before I received it I had purchased a box of the exact same pasta to try out! So, tonight I pulled together a few of my favorite veggies, some fresh basil, cheese and the pasta and whipped up a tasty and healthy dish!

Tri-Colored Warm Pasta Salad
1 Package Buitoni Wild Mushroom Agnolotti
2 Medium Zucchini, halved, then chopped
2 Large Yellow Bell Peppers, chopped
1 Pint Grape Tomatoes
2 Smashed Cloves of Garlic
Olive Oil
Salt
Pepper
1/4 Cup Grated Parmesan
1/4 Cup Shredded Romano
2 Tbsp Fresh Chopped Basil

1. Salt a pot of water for the pasta, set it to boil on the stove.
2. Oil a large skillet, heat on high until skillet is hot.
3. Drop garlic, zucchini and bell peppers into skillet, season liberally with salt and pepper. Saute five minutes.
4. As veggies are sauteing, cook pasta. Once it is tender, drain and set aside.
5. After zucchini and bell peppers are tender, drop tomatoes in, allow to cook two minutes.
6. Remove garlic from skillet, set aside.
7. Drop pasta, cheese and basil into skillet, mix well. Serve hot!


Gloria at Foods and Flavors of San Antonio, my Tex-Mex Sister awarded me the Premio Meme Award, seven questions about me. It's one of those things you fill out and share, so here are my answers (and those I'm passing it on to!):

Here goes nothing...seven traits that best describe me

1. An addict - well not in the substance-abuse kind of way, it's my way of saying I become addicted to things, hobbies, activities and causes. Once I am involved with something I will keep it up and give it my all, passionate, dedicated, all the same to me as being addicted to things that are important to me.

2. An introverted extrovert - I'm outgoing and yet can be a very quiet, wallflower kind of person. A strange combination, but one that makes me a good listener and a good do-er too! I like to take charge and make things happen but as my mother can attest, in unfamiliar situations (more when I was younger than now) I'm bad about watching from the sidelines before jumping in.

3. Soft-hearted - Friends and loved ones will tell you that I pretend that things don't bother me and/or that I don't care but that it's a farce...I will help anyone, listen to anything and do whatever I can to help others who need help (even those who won't necessarily speak up).

4. Punctual - To a fault I can't stand to be late, which is kind of an issues since my best friend, boyfriend and sister (the three people I spend the most time with) all seem to run on their own timezones, not criticising them, just telling the truth....one of those things that makes me nuts! I'm trying to be more flexible but the OCD part of me makes it really tough!

5. Organized Chaos - A great description of my mind and office space (both home and work), I know where all of it is, you just have to give me time to recall/find it! Now where did I put traits 6 and 7....

6. A Modern Southern Girl - I was raised with Southern mannerisms, southern cooking and southern zip codes but I am fiercely independent and want to make my own way in the world. I do not want to depend on anyone to get ahead but myself, I was raised by a strong southern woman and come from a long line of them so I'd better keep up the tradition!

7. Creative - I wouldn't really describe myself this way typically, I like symmetry and order and don't feel like that's terribly creative but I also recognize that my love of cooking, photography, knitting, art (even though I'm an extremely bad artist) and beading makes me some how/some way and some form of creative.


So now, drumroll please...I'm passing this on to the following:

Grace of A Southern Grace
Karen at DomesticMuse
Kimmie at Full Circle
Katherine at Smoky Mountain Cafe
Tangled Noodle at Tangled Noodle
Chef E at The Behind the Wheel Chef
Donna FFW at My Tasty Treasures

Thursday, April 16, 2009

Semi-homemade pasta for the time crunched...

Some weeknights just don't lend themselves to serious cooking, yup this entire week has really been like that for me...some semi-homemade dinner on Monday (same tonight), sandwiches and leftovers in between...truth be told tomorrows shaping up for a semi-homemade dinner so why not make this a trifecta of easy semi-homemade dinners....tonight, Buitoni Wild Mushroom Agnolotti with homemade sauce. Ok for those of you who frequent the Food Network I feel that I should go ahead and acknowledge the reference of semi-homemade, it's a Sandra Brown reference, she's not my favorite (yea I'm sure someone just got upset with me for saying that) but since I'm throwing her phrase around here I need to give her credit!

Two Steps to my semi-homemade pasta dinner...

Step one - buy some pasta :)

*Funny side note here, literally the day after I posted this recipe a substantial sized box appeared on my front porch from Foodbuzz (oh, how I love Foodbuzz), inside my box....dry ice and Buitoni Wild Mushroom Agnolotti! Foodbuzz and Buitoni have either started reading my mind or just have very fortuitous timing...needless to say you might see another sauce for these delicious little pastas soon!


Step two - pasta sauce!

Ingredients
2 28oz cans diced tomatoes
1 medium chopped onion
2 cloves minced garlic
1 tsp fresh oregano
salt/pepper
2 bay leaves
1 tsp dried basil
1 tsp fresh thyme
1 6oz can tomato paste
1 1/2 cup parmesan
1/2 tsp salt
1/2 tsp black pepper
3 strips chopped raw bacon

Directions
1. Cook bacon in a large pot at medium-high.
2. When bacon is nearly cooked, saute onion, garlic and for five minutes (or until tender), season with salt and pepper to taste.
2. Add tomatoes, oregano, thyme, basil and bay leaves to pot. Bring to a boil, season with additional salt and pepper if desired.
3. Reduce heat and simmer, stir in tomato paste. Allow sauce to reduce, approximately 30-45 minutes.
4. Serve topped with fresh chopped basil.